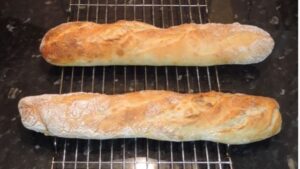
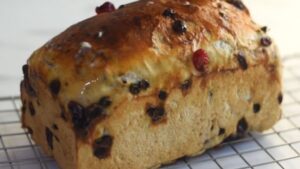
Pan Sobao Is a must try Recipe. Pan Sobao has a long history in Puerto Rico; it was traditionally cooked with lard, hence the term “pan de Manteca.” It has a chewy texture, is soft, and has a slight sweetness to it. We tried a number of various recipes and did a lot of experimenting to come up with the ultimate version of this Puerto Rican favourite.
What Exactly Is Pan Sobao?
Pan Sobao is a sweetened lean bread with a pre-fermented filling. When I say sweet, I don’t mean “danish-sweet,” but rather a subtle sense of sweetness.
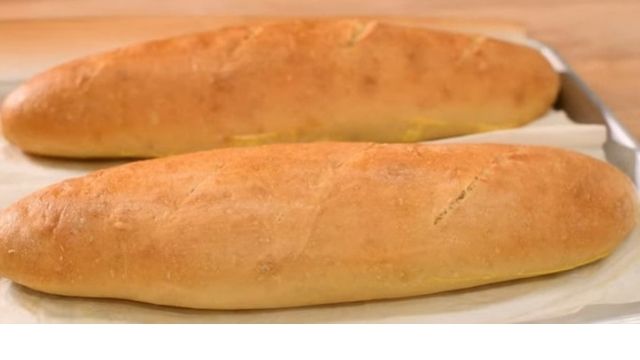
The bread is baked in a steam-filled oven to keep the crust crisp, but not baguette-like. With a cup of the cafe with Leche, I devour my toasted and buttered pan Sobao. I also like to use Pan Sobao in recipes for french toast, as sandwich bread, and in bread pudding.
Pan Sobao Recipe (Soft Puerto Rican Bread)
Cook Time: 15 minutes
Cuisine: Puerto Rican
Total Time: 35 minutes
Prep Time: 20 minutes
Servings: 48 servings(4 one pound loaves)
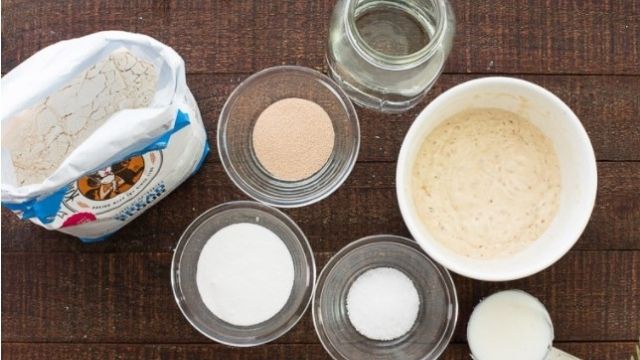
Ingredients
Poolish (Sponge)
- 4 tablespoons (16g) bread flour
- 4 tablespoons warm water
- 1/4 teaspoons (1g) active dry yeast
Bread Dough
- 6 tablespoons granulated sugar
- 3 cups warm water divided
- 1/2 cup Goya Lard, Recommended
- 2 tablespoons LYC/RSYC Active Dry Yeast, Recommended
Poolish
- 3 teaspoons kosher salt
- 9 cups of bread flour
Direction
Make the Poolish
To make the poolish, combine the bread flour, water, and yeast in a small mixing bowl. After covering the bowl with plastic wrap, let it sit at room temperature for eight hours. After eight hours, return it to the fridge for another twenty-four hours (or until ready to make your bread). Allow no more than 24 hours for fermentation.
Make the dough for the bread
Remove the poolish from the refrigerator and set it aside to come to room temperature an hour before mixing the bread dough.
In the bowl of a stand mixer, combine 6 tablespoons of warm water, sugar, and yeast. Allow five minutes for the yeast to flourish.
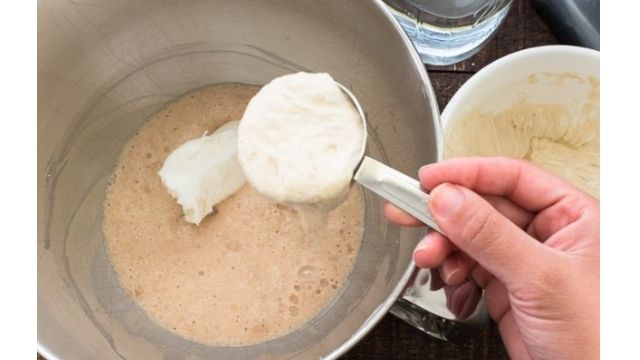
In a large mixing bowl, combine the lard and the room temperature poolish, then add the remaining warm water. Mix on medium speed for 2 minutes, or until completely mixed, with the paddle attachment.
Gradually add 6 cups flour, followed by the salt, to the mixture while running at the lowest speed. After the mixture resembles a thick batter, switch from the paddle attachment to the dough hook.
Slowly add the remaining flour to the bowl while mixing on low. You may need more or less flour than this recipe calls for, depending on your elevation and how humid the day is.
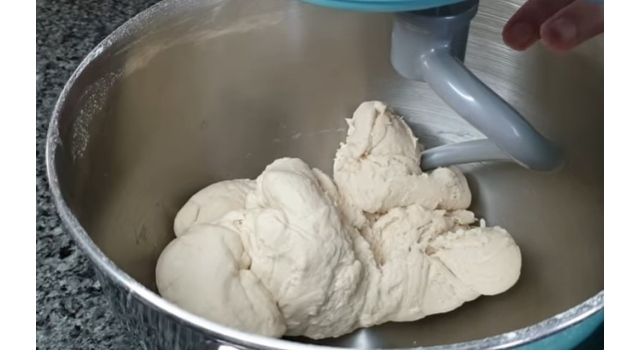
In the mixer, knead the dough for 10 minutes. The dough will begin to peel away from the bowl’s sides and ascend the hook. The dough should be flexible and soft, but not sticky.
Dough Fermentation
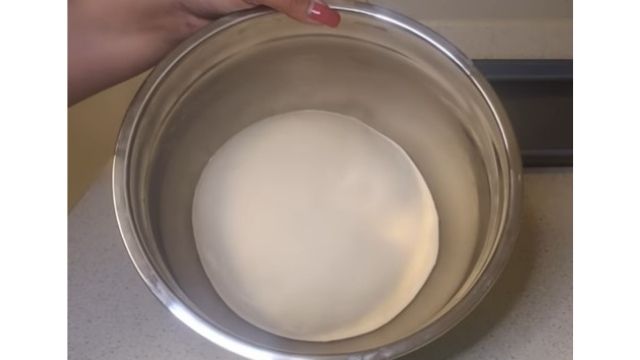
Remove the dough from the mixing bowl, lightly grease the bowl with vegetable oil, and return the dough to the bowl. Cover the dough with plastic wrap and turn it over so the greased side is on top.
Place the bowl in an oven that hasn’t been preheated or in the microwave. Close the door and set aside for an hour, or until the bread has doubled in size.
Form the Dough
After the fermentation period has passed, punch down the dough to release the carbon dioxide that has built up in the dough. Fold the dough three or four times over itself to disperse the yeast and manage the dough’s temperature. After inverting the bowl over the dough, let it rest for five minutes.
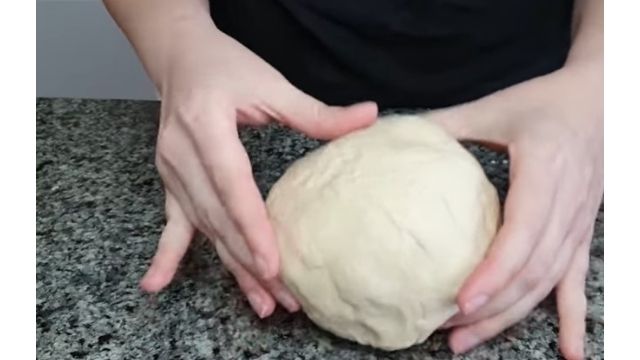
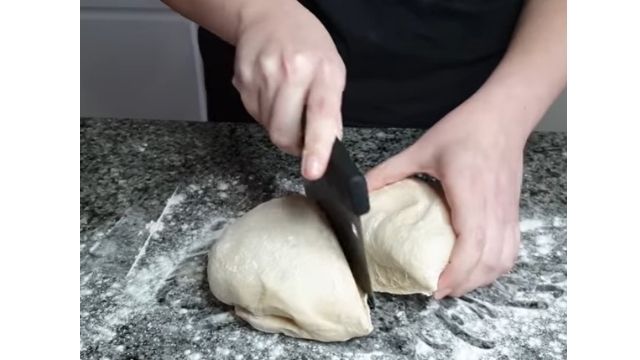
Cut the dough ball into four equal parts. Rotate the dough into a smooth ball using the sides of your cupped palms. Allow the dough to rest for 10 minutes on the counter, covered with a kitchen towel. To make 12 “logs,”
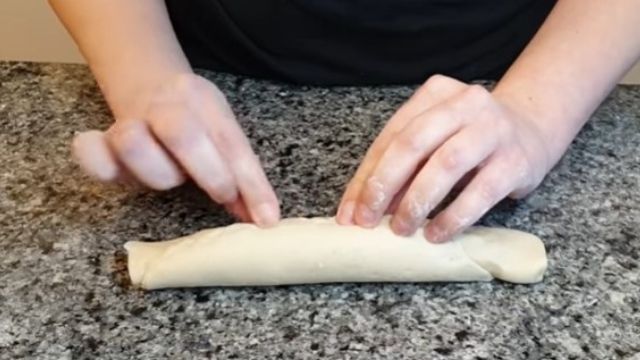
Push the dough ball back and forth between the fleshy parts of your palm and the counter. When the dough is shaped, place it on a parchment-lined half-sheet pan.
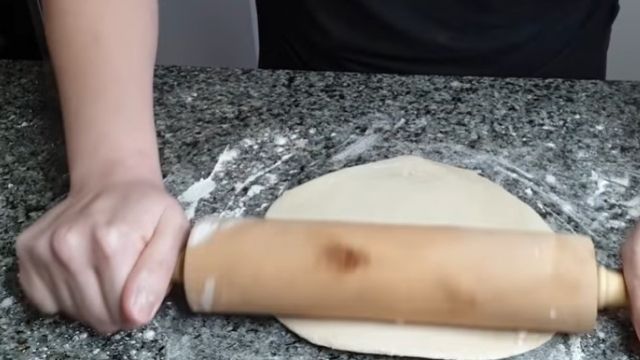
Place the pan in the unheated oven, but switch on the oven light this time. Allow the dough to rise for 30 minutes to an hour, or until it has doubled in size. When you lightly touch the dough’s surface, it should slowly spring back.
Bake
Preheat your oven to 400°F while your dough is rising. Place a cast-iron skillet above, or beneath, an empty rack in the oven at the same time.
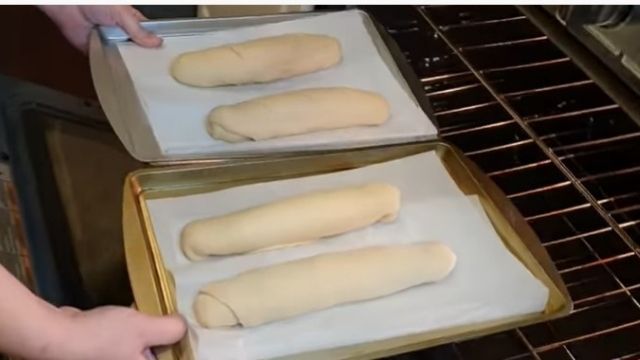
When the bread has finished proving, carefully pour two cups of ice into the cast iron skillet that has been baking. Allow five minutes for the steam in the oven to build up before closing the door to avoid too much steam from escaping.
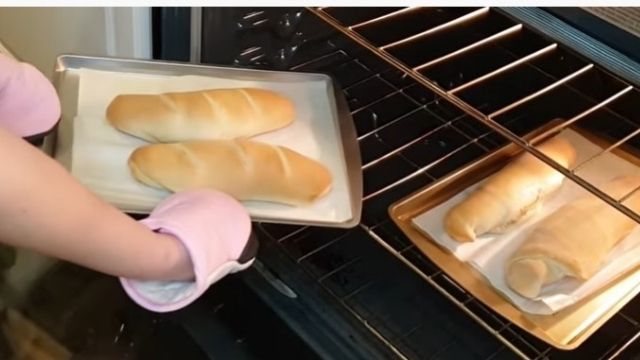
Bake for 15-20 minutes, or until brown and hollow when tapped, in the sourdough pan on the empty oven rack. After the bread has baked, remove it from the oven and set it aside to cool for five minutes.
Remove the loaves from the pan and cool thoroughly on a cooling rack.
Notes
A quick word regarding Pan Sobao:
I’ve gotten compliments on how sweet my Pan Sobao is. Sugary-sweet Pan Sobao should be avoided. It should have a hint of sweetness, but not to the point of being overpowering. If you grew up eating really sweet Sobao Bread, however, you might want to boost the sugar to 1/4 cup or 1/2 cup. To account for the extra sugar, reduce the baking temperature by 5°F (395°F).
Individual loaves should be wrapped in plastic wrap and frozen in bread bags. Pan Sobao can be frozen for up to two months.
Note about the freezer:
Because frozen and thawed dough does not rise as high as freshly baked dough, I normally recommend baking the Pan Sobao shortly after creating the dough and then freezing them.
If you’re going to freeze the uncooked dough, make sure the panned loaves are thoroughly thawed first. Once they’ve thawed, take them out of the fridge and let them prove (or rise) in a warm atmosphere for about 1 1/2 hours. Then bake them according to the package instructions.
Slice Your Pan Sobao And Enjoy It!
Using a serrated bread knife, cut the bread into pieces. With a cup of coffee, toast with butter, I adore pan Sobao. You are free to eat your bread however your heart wishes.
Because apple season is approaching, this Apple-Pear Butter would make an excellent slathering companion. A little jam and butter would be nice, too. Make sure you finish this Pan Sobao in two or three days, whatever you decide to do with it.
After a day or two, even if stored in a plastic bread bag or bread box, this will go stale. If it comes to that, you can simply turn stale Pan Sobao into french toast or croutons.
Take a peek at my Barefoot Contessa Zucchini Bread Recipe if you’re interested.
Nutrition Information
Amount per serving And % Daily Values
Serving: 48 Calories: 113 | Total Fat 2.2g – 3% | Saturated Fat 0.8g – 4% | Cholesterol 2mg – 1% | Sodium 153mg – 7% | Total Carbohydrate 19.2g – 7% | Dietary Fiber 0g – 0% | Total Sugars 2.3g | Protein 3.2g | Vitamin D 0mcg -0% | Calcium 1mg – 0% | Iron 1mg – 5% | Potassium 1mg – 0%
The Percent Daily Value (DV) of a nutrient in a food serving indicates how much it contributes to a daily diet. The standard nutrition advice is 2,000 calories per day.
Nutrition Information
Calories: Protein: 6g | 197kcal | Saturated Fat: 1g | Carbohydrates: 35g | Potassium: 53mg | Fat: 3g | Sodium: 122mg | Fiber: 1g | Iron: 1mg | Sugar: 2g | Calcium: 7mg |
This recipe idea is I took from SENSE & EDIBILITY BY Marta Rivera
More Details Description On Pan Sobao Recipe
MAKE THE STARTER ONE DAY AHEAD OF TIME
The poolish, which will be added to the dough the next day, is the first step in this Pan Sobao recipe. A poolish is an entrance that does not ferment as much as a mother’s entrance.
The outcome is a tasty dough that requires less time to prepare than a traditional sourdough starter. Because of how it behaves once grown, the poolish is also known as a “sponge.” When it reaches full maturity, it bubbles and becomes, well, squishy.
It’s easy to make a poolish by mixing equal quantities of bread flour and water, then adding yeast. Wrap the ingredients in plastic wrap and set them aside.
Allow for eight hours at room temperature before transferring to the refrigerator for another twenty-four hours. If the poolish is left out for more than twenty-four hours, the quality begins to decline. When stirred, the perfect poolish is thin and stretchy, with a pleasant, tangy aroma.
THE PROCESS OF MAKING BREAD
One loaf of bread goes through a total of twelve recognized phases. This twelve-step program does not include the poolish mentioned above. The ingredients must first be measured or scaled.
This is the second step: mixing the dough. A loaf of bread appears to be a rather straightforward process; after all, it’s just flour, water, and yeast, right? In a nutshell, yes and no.
It’s merely a combination of those three components (plus or minus a few more), but the chemistry of the bread can make or break the loaf. Because there are several steps to producing your bread, you can use a variety of approaches to attain success.
To add to the mix, I came up with Marta’s Modified Straight Dough Method or MMSDM. (Now that I’ve read it aloud to myself, it appears to be a different way of life.)
The MMSDM is a hybrid of the Straight Dough Method (combine yeast and water, then add flour and remaining ingredients and mix) and the Modified Straight Dough Method (yeast + water, oil and sugar, then flour and mix).
The MMSDM is as follows: in the bowl of your stand mixer, add a portion of the water, all of the sugar, and the yeast. Allow the yeast to blossom (or be resurrected) by feeding it sugar and allowing it to be warmed by the water.
Within minutes, healthy, living yeast will foam and bubble. Five minutes is the maximum bloom time. After five minutes, if you don’t have a frothy mixture in your dish, your yeast is probably dead and needs to be discarded.
ADD THE POOLISH PAN SOBAO
The fat and the room temperature poolish are added in step two of the MMSDM. I’m using lard as my fat because that’s how Pan Sobao is traditionally cooked in Puerto Rico.
However, vegetable shortening can be substituted. I take the poolish out of the fridge one hour before mixing it in. This allows it to reach room temperature, allowing the growing dough to keep a consistent temperature.
I add the leftover water to the dish after I’ve added the fat and sponge. Then I start mixing it with my mixer’s paddle attachment. You can absolutely do it by hand, but it’ll be a workout in and of itself.
THE STAGE OF “PICK-UP”
No, we aren’t at a mixer for singles. The “pick-up stage” of bread preparation refers to the process through which the dough gradually absorbs flour (and salt). To begin, we’ll make a buffer between the yeast and the salt. The bread flour acts as a barrier. Because yeast and salt are like me and my ex, they don’t get along, bread flour is required.
We can now add the kosher salt after we’ve added 5 cups of flour. Salt kills yeast when it is directly exposed to it, which is why we don’t use it without additional components to dilute it.
Continue to mix while slowly and steadily adding the remaining flour to the bowl. You’ll see why it’s been dubbed the “pick-up stag.”
When mixing bread doughs with your stand mixer, keep it on a low setting. Even softer bread doughs, like this one, are notoriously hard on mixer gears. In my time, I’ve burnt out a few. Make small batches of bread dough and use a low-speed mixer.
If your mixer starts to smell or sounds sluggish, switch it off and wait for it to cool down before continuing.
STAGE OF CLEANING
After you’ve completed the pickup step of bread mixing, you’ll move on to the cleanup stage. We’ve added all of the flour to the dough and now need to clean it up so it’s not fuzzy and all over the place. To do this, switch from the paddle attachment to the dough hook.
To avoid burning out your mixer’s motor, reduce the speed to the lowest setting feasible. And then there’s the mixing. The more gluten grows in the dough, the more it will “stretch” out for more. To put it another way, the plate has been “cleaned”.
Your bowl should be free of any leftover dough after around 10 minutes, and it should have started climbing onto the hook. Because we’re building the gluten strands that good bread should have, this is referred to as “developing the dough.”
The final product is a soft, elastic dough that is not tacky. It should take about 10 minutes in the mixer or hand kneading to get to the final stage of the mixing process.
PAN SOBAO DOUGH FERMENTATION IN BULK
Bulk fermentation, often known as the third step in the bread-making process, entails fermenting the entire batch of dough at the same time. This signifies the dough hasn’t been sectioned or made into loaves yet.
The fermentation process is critical because it permits the gluten we worked so hard to produce in the mixing stage to become more elastic.
It also allows the yeast to begin to leaven the bread by feeding on the sugars and carbohydrates in the dough (or make it rise). This step is critical since it is what makes the bread chewy and filling.
I like to take the Pan Sobao dough out of the bowl, lightly butter it, and then put it back in. Cover the bowl with plastic film after turning the dough once to ensure the oiled surface is on top.
This helps contribute to the volume I mentioned before by keeping the carbon dioxide gas in the bowl. What is the ideal fermentation environment? An oven that hasn’t been preheated.
This atmosphere has shown to be ideal for achieving a fantastic rise in any bread dough I prepare. You really shouldn’t make this recipe if you don’t have an oven… make use of your microwave
Allow for one hour of fermentation, or until the bread has doubled in size. This process cannot be extended to get more bread dough. If the procedure is allowed to continue indefinitely, the dough will deteriorate. “Old” doughs have been fermented for an extended period of time and are exceedingly sticky and difficult to deal with.
PUNCH DOWN THE RISEN SOBAO DOUGH IN THE PAN
However, we extract this dough while it is still “young” in this recipe because we need to shape it and allow it to rise again. But first, we must demolish it.
After fermentation, punching down the dough squishes it, releasing the carbon dioxide produced during step three. We’re also allowing the dough to attain a uniform temperature at this point.
The dough at the bowl’s top has a different temperature than the dough in the centre. The warmth of the dough is more uniformly distributed as it is folded.
It also allows the gluten a chance to unwind after all of its strainings. In this stage, you’re not pounding the dough; instead, you’re folding it over itself to achieve the goals listed above. Fold the dough in half three or four times.
After that, flip the bowl over the dough and let it settle for five minutes. Make silly faces in the bowl and shoot pictures to share on Instagram while you wait.
UPGRADE THE DOUGH
Step four is to scale the dough. Normally, at a bakery, we would measure out the dough and be really precise, but… That is not something I do. I like to “wing it,” as we say in the business.
To be honest, you can weigh it if you want to get identical amounts of dough per loaf. I just form it into a ball by eyeballing it.
FINISHING THE DOUGH
Another phase in the twelve-step process of creating bread is rounding the dough, however, I don’t always stick to it. It helps to mould the dough into its final form easier, according to my professors, but I think it’s just an extra step.
I’m putting the pressure on you because it’s been driven into me that it’s something we have to do. If you decide to give in, simply twist the dough into a smooth ball with the sides of your cupped palms.
PROOF ON THE BENCH
This is a challenging phase. Allow the Pan Sobao dough to rest for 10 minutes on the counter, covered with a kitchen towel. Isn’t that a difficult task? Allow the gluten in the dough to rest before attempting to shape the dough.
MAKEUP
Push the dough ball back and forth between the fleshy side of your palm and the countertop. The ultimate shape of your bread is created by shaping the dough.
You’ll shape the ball into a smooth log with a smooth bottom and top. Once you’ve started this shape, finish it off by rolling it between your open palms.
PANNING
Panning is technically part of the prior step, but I need to see it, so I’m doing it. Plus, it’s such a small step that it’s only a half-step. When the dough is shaped, place it on a parchment-lined half-sheet pan.
Proofing is the same as bulk fermentation, which you completed previously. Because the bread is no longer in its bulk state, it is no longer referred to as “bulk fermentation.”
This level might take anything from 30 minutes to an hour to finish. Once again, your unheated oven is the perfect spot for this, but this time switch on the oven light.
When this is combined with the dough being covered, a humid environment is created that is ideal for proving. If your oven has one, use the test function. When the Soldier asked what it does, I discovered that mine has one. I had no idea it was there.
You’re seeking loaves that will double in size once again. When you lightly touch the dough’s surface, it should gradually recede. If it rebounds back quickly, it will need to demonstrate its worth over a longer period of time. On the other hand, no spring back indicates that it has been over-proofed. It’s still possible to bake it, but it’ll most likely deflate and become dense.
One challenge you may encounter is having only one oven. If this is the case, simply prove the dough in the microwave once again. If your microwave has a metal rack insert, lay the pan on it and add a cup of boiling water beneath it to provide the humidity you require.
You can look at my 3 Best Booty Dip Recipe If you’re interested.
PAN SOBAO’S SOFT CRUST IS GIVEN TO IT BY CREATING A STEAM-INJECTED OVEN
Begin preheating your oven while your dough is proving. You won’t bake at as high a temperature as you would with most bread since you want a softer, not crunchy, crust.
Preheat the oven to 400 degrees Fahrenheit instead. As soon as the oven is turned on, put a cast iron skillet in it. Place this skillet on a higher or lower rack in the oven, leaving an empty rack in the center.
Your oven should be scorching and the skillet should be screaming hot by the time your bread has completed proofing. Add two cups of ice to the cast iron skillet as soon as the bread is done proofing.
Allow five minutes for the steam in the oven to build up before closing the door to avoid too much steam from escaping. Place the proofed dough pan on an empty oven rack and bake for 20 to 25 minutes, or until the bread is golden brown.
Remove the Pan Sobao from the oven once it has done baking and let it cool for five minutes. Remove the loaves from the skillet and cool on a wire rack. This prevents the Pan Sobao from steaming as it cools.
The bottom will become mushy and sad if you leave it to cool on the pan. When it’s cold enough to handle, wrap it in plastic wrap and freeze it in a bread bag.
